- Get Started
- Dashboard
- Block Configuration
- Dashboard
- Widget
- Widgets/Tiles Actions
- Tiles
- Switch Roles
- Switch Dashboards
- Duration Filter
- Role-wise Dashboards
- Configuration
- Report Page Overview
- Design Reports
- Columns & Filters
- Calculations
- Ordering
- Enable Exports
- Conditions
- Permissions
- Schedule Report
- Graphs
- Jump to Another Report
- Duration Filter
- Reports
- Statistic Reports
- Course Summary
- Learner's Summary
- Graded Activity Information
- Quiz Overview
- Assignment Report
- SCORM Report
- Resources
- Learners Activity Summary
- Learner Course Activities
- Learner Quizzes
- My Quizzes
- Learner Assignments
- My Assignments
- Learner SCORM’s Overview
- My SCORM
- Learner Resources
- Enrolled Courses
- Badge Summary
- My Badges
- Section Wise Learner Performance
- Learner Activity Grade
- Competency Completion
- Site Level User Timespent
- Content Page Average Timespent
- Resource Accessed
- User Timespent
- User Profile
- Course Profile
- SQL Reports
Installation
From the LMS
- Click on Site Administration from the navigation block.
- Select the Plugins tab from the list of tabs.
- Click on Install Plugin from the options. The page is redirected plugin installer.
- If the user chooses to download Moodle version 3.4, he/she can just choose the whole zip file.
- If He/she choose to download any version other than 3.4, then the user needs to unzip the file and install the Learnerscript file first and then followed by report tiles and report dashboard from the zip.
- User can install the Plugin by Choose File option or he/she can drag and drop the downloaded zip file in the drag and drop box.
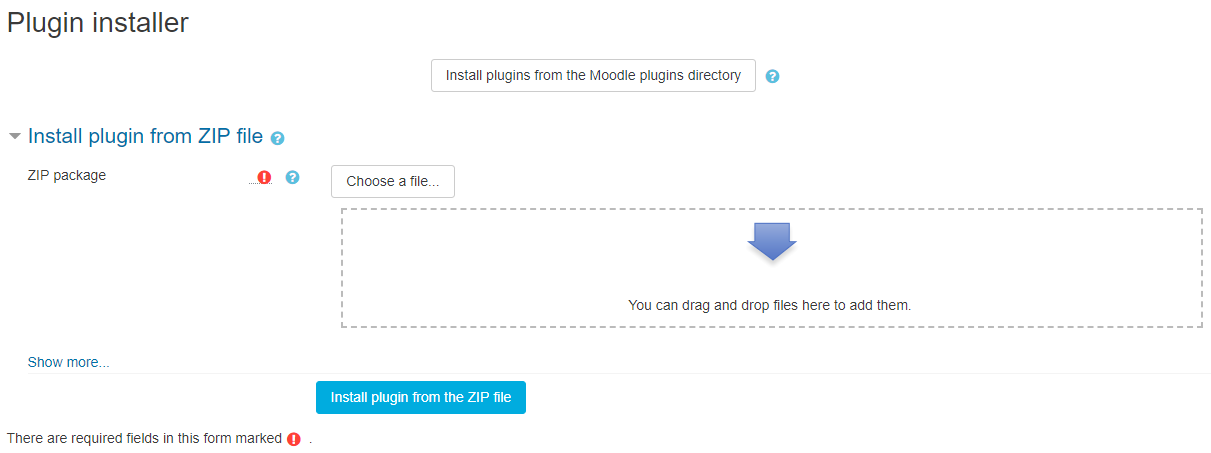
- Click on Install Plugin from the zip file.
And click on continue till the Upgrade of the new version is successful.
License
- To Activate the license, the user needs to have the License Key which is sent to the user through a mail when the product is purchased. Then the user can have the license Key from the LearnerScript site account.
For the License Page:
- Click on Site Administration from the dashboard.
- Select the Plugins tab from the list of tabs.
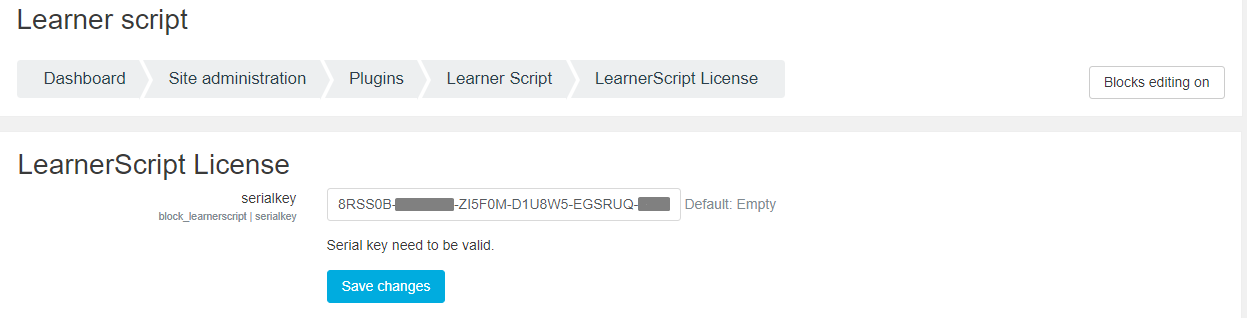
- Select the LearnerScript from the options.
- Click on License mention the Serial Key or License Key in the Serial Key field.
- Click on Save Changes to save.
- Once the changes are save the page is redirected to the automatic configuration where the role, dashboards, reports, blocks, and widgets are configured.
- Once the configuration is successfully completed, User can see the dashboard with the configured reports.
- Once the Dashboard is configured, user can see a Pop- Up on the dashboard with a Welcome Message and option to take a tour.

